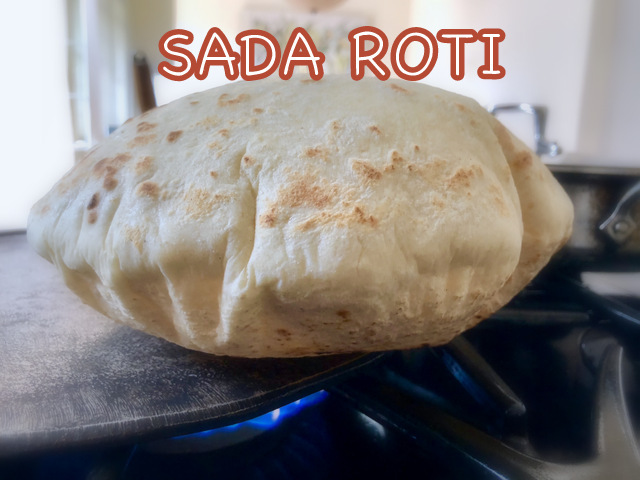
SADA ROTI RECIPE
Sada roti is one of the main staples in Trinidad. It is a leavened flat bread eaten for breakfast or dinner with a variety of vegetarian, fish or meat dishes--including curries or stews. It is to Trinidad what flour tortilla, naan, pita bread and chapati are to the rest of the world!
Print
Pin
Servings: 16
Calories: 115kcal
Equipment
- Tawa
Ingredients
- 4 cups all purpose flour unbleached, more for kneading and rolling
- 4 teaspoons baking powder aluminum free
- 1 teaspoon Himalayan salt optional
- 1 1/2 cups lukewarm water
Instructions
- In a medium bowl, combine the flour, baking powder and salt.
- Make a well in the flour and add water gradually until the dough looks shaggy. Mix and knead with your hands until the dough is smooth, medium soft and not sticky, 3 to 4 mins. Watch my detailed YouTube Video on how to accomplish this. Cover and set aside at room temperature for at least 15-30 minutes.
- Divide the dough into four equal pieces. Shape each piece into a ball by rolling each between the palm of your hands, applying gentle pressure until the balls are smooth and without cracks--squeeze it at the top to seal properly. Cover the dough balls loosely with a cloth and let rest for a minimum of 5-10 minutes.
- When you are ready to cook the roti(hopefully the dough is ready as well), heat the tawa, dry cast-iron skillet or griddle over medium heat until hot.
- Working with one ball of dough at a time (keep the remaining dough covered) and using just enough flour to prevent sticking to counter and rolling pin, press the dough into a small flat circle(about 4 inches). Using the rolling pin, roll the dough. Flip, rotate and roll until it becomes an even 9 inch round, ¼ inch thick, making sure that the edges are not thick. If you can’t make it round, don’t panic, it tastes just as good.
- Pick up the dough, place it on the palm of your hand and lay it on the tawa by quickly flipping your hand over the tawa. Cook until small bubbles appear on the roti, about 30 seconds. Turn immediately using your fingers or a spatula and cook until the bottom is lightly browned in spots, about 45-60 seconds more.
- Flip again and cook until the roti puffs entirely or in spots and browns lightly on that side, 45-60 seconds more (if it doesn’t puff, the tawa isn’t hot enough, the dough is too dry, or you cooked it too long on the first side).
- Alternatively, using a cloth move tawa to expose open flame and toast edges of roti; rotating roti over the flame every two seconds, until the entire roti puffs up(roti should not touch flame but sit about an inch or two above it). You may need to flip roti and toast the other side also to “make the roti swell”—puff up…It does not puff up every time, but it is just as good.
- Remove the roti from the tawa, dust off excess flour and wrap the roti immediately in a clean, dry cloth or kitchen towel.
- Repeat rolling out and cooking the remaining dough, stacking and wrapping the finished roti in a clean kitchen cloth/towel. Once they're all cooked, let them rest covered for 10 to 15 minutes before serving. During this time, they'll steam themselves, becoming soft and pliable. You can also wrap the cloth-wrapped stack in foil and keep warm in a 200°F oven for about an hour.
Video
Notes
I want you to know that you may not achieve the feeling of joy of a swollen roti in your first 100 attempts (even though many have after watching my You Tube Video!) but rest assured you will still have roti. My advice to you is to aim for a soft roti, one you can chew. The swelling of the roti is just a bonus, a goal to work towards!
Calorie calculated is for a quarter of a roti.
• Measure the ingredients accurately, using a measuring cup for dry ingredients and not liquid.
• Use good baking powder; old or expired baking powder will result in raw roti.
• Is the dough moist or dry after kneading? It should be moist but not too soft.
• Ensure that the dough is rolled out—not too thick or thin—if too thin, it will be stiff and if too thick, it will not cook properly.
• If the dough is springing back when rolling out, leave it to rest longer.
• The raw dough can be kept in the fridge for a day or two until you are ready to make the roti.
• Well-wrapped roti keep in the freezer for up to a month. Thaw overnight in the refrigerator and reheat before using. Nutrition was calculated per 1/4 roti.
Nutrition
Calories: 115kcal | Carbohydrates: 24g | Protein: 3g | Fat: 1g | Saturated Fat: 1g | Sodium: 148mg | Potassium: 134mg | Fiber: 1g | Sugar: 1g | Calcium: 49mg | Iron: 2mg