It’s the holiday season, and there’s no better time to bake a new type of bread to impress yourself or your family!
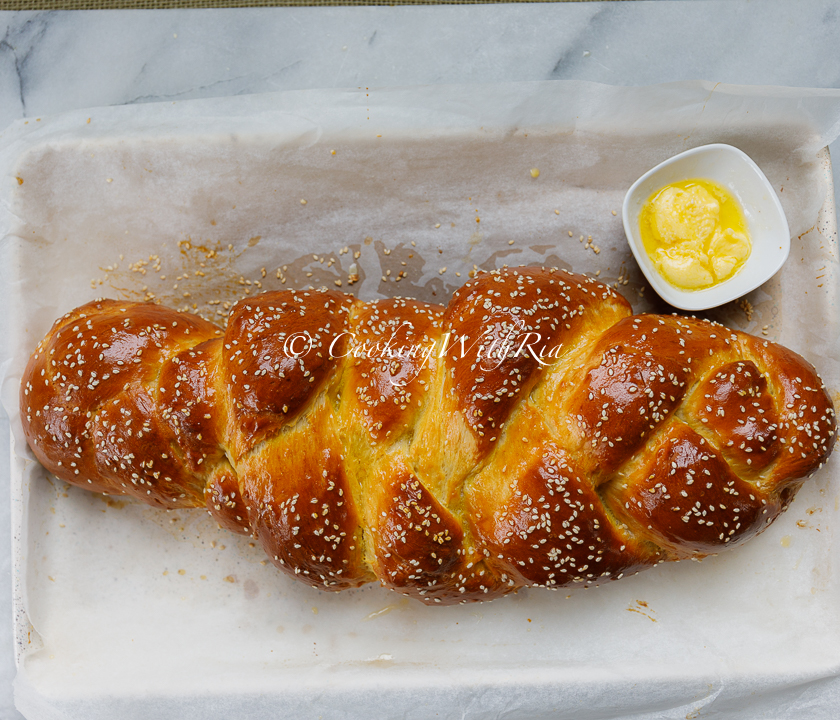
This recipe is a combo of challah and Guyanese plait bread and can be adjusted to make either.
Challah is a traditional Jewish bread that boasts a rich history steeped in cultural and religious significance. Its origins can be traced back centuries, with roots deeply embedded in Jewish Sabbath and holiday traditions.
What is the difference between challah and Guyanese plait bread?
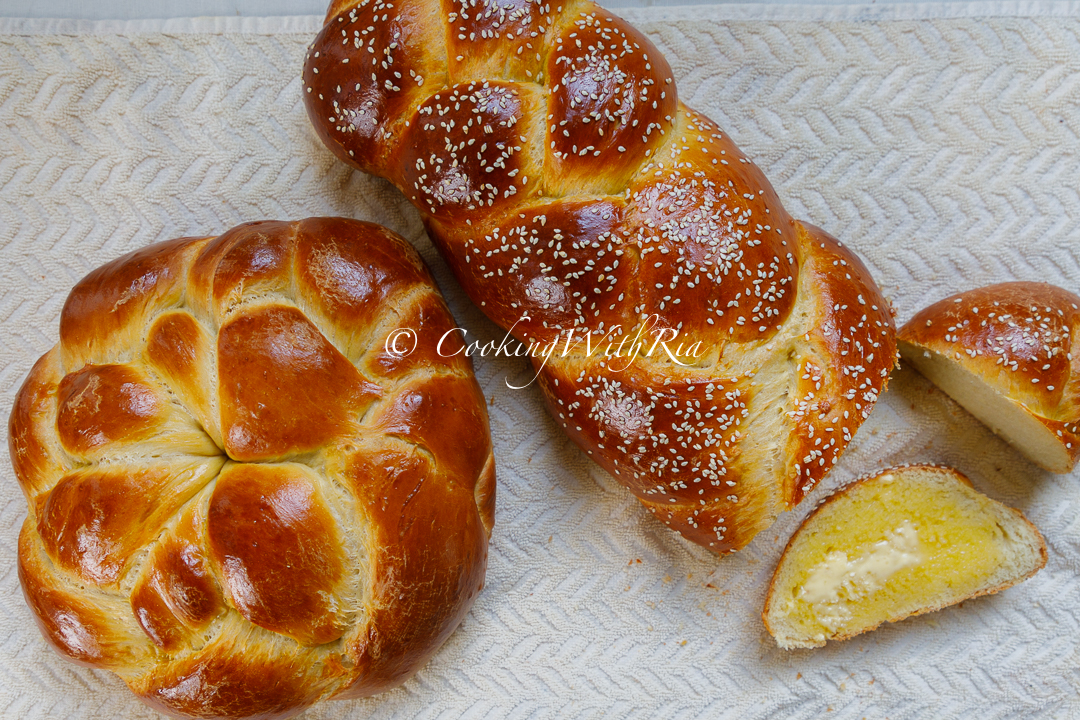
On the other hand, Guyanese plait bread is similar, especially in appearance; it is made with or without eggs, butter, and not oil, sugar, and not honey, and there is no egg wash.
It was brought to Guyana by the Portuguese settlers. Guyanese enjoy it for the holidays or with stews or pepperpot.
What is the difference between challah and brioche?
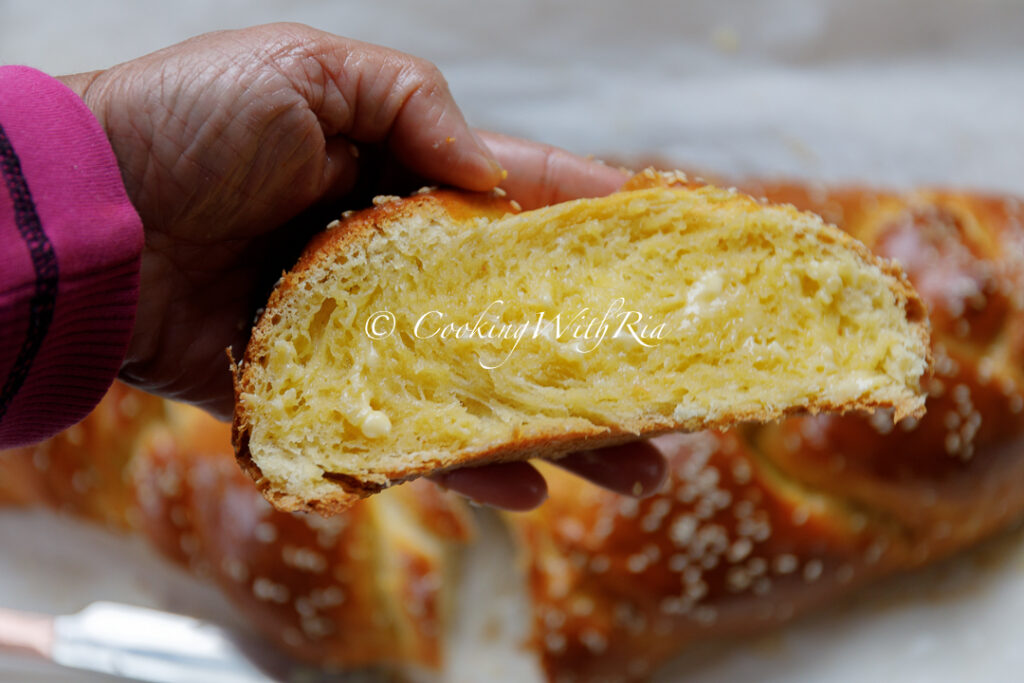
Both are similar in texture, appearance, and sweetness; however, challah is typically made with oil and not butter due to kosher requirements. In addition, brioche has more eggs and butter!
How to make this recipe kosher?
To make this vegan or Kosher, use a butter substitute or vegetable, canola, or olive oil/extra virgin olive oil instead of butter.
What are the ingredients in challah?
Flour: All-purpose flour
Dry yeast: Active or instant dry yeast to aid in rising
Water: Lukewarm water, around 110°F, is used to activate the yeast.
Granulated sugar or honey: To add sweetness
Eggs: This provides richness and helps bind the dough. Not typical in Guyanese Plait bread.
Butter: adds buttery richness and makes a softer bread. See Kosher substitutions
Salt: To enhance flavor
Egg wash: To brush on dough immediately before baking to create a rich sheen and golden-brown color.
Optional toppings: Sesame seeds or poppy seeds to add visual appeal and flavor
How to store challah bread?
I leave it in a resealable bag on the counter for up to a week. Stale challah is used to make French toast or bread pudding!
Creating the perfect challah bread involves a combination of technique, ingredients, and attention to detail. Here are 10 tips to help you achieve the perfect challah:
Use high-quality ingredients:
Start with fresh, high-quality ingredients. The better the quality of your flour, yeast, eggs, honey, and butter, the more flavorful and rich your challah will be.
Measure Accurately:
Accurate measurements are crucial in baking. Use measuring cups and spoons to ensure precise amounts of flour, water, yeast, and other ingredients for consistent results.
Activate yeast properly.
Ensure that your yeast is active by dissolving it in warm water and allowing it to foam (do not stir). This step is crucial for the leavening process, and active yeast contributes to a light and airy texture.
Balance Flour Quantity:
While kneading, gradually add flour as needed to prevent the dough from being too sticky. The goal is to achieve a smooth and elastic consistency without making the dough too dense.
Knead Thoroughly:
Kneading develops the gluten in the dough, providing structure and texture—Knead for about 10 minutes or until the dough becomes smooth and elastic.
Proper Rising Time:
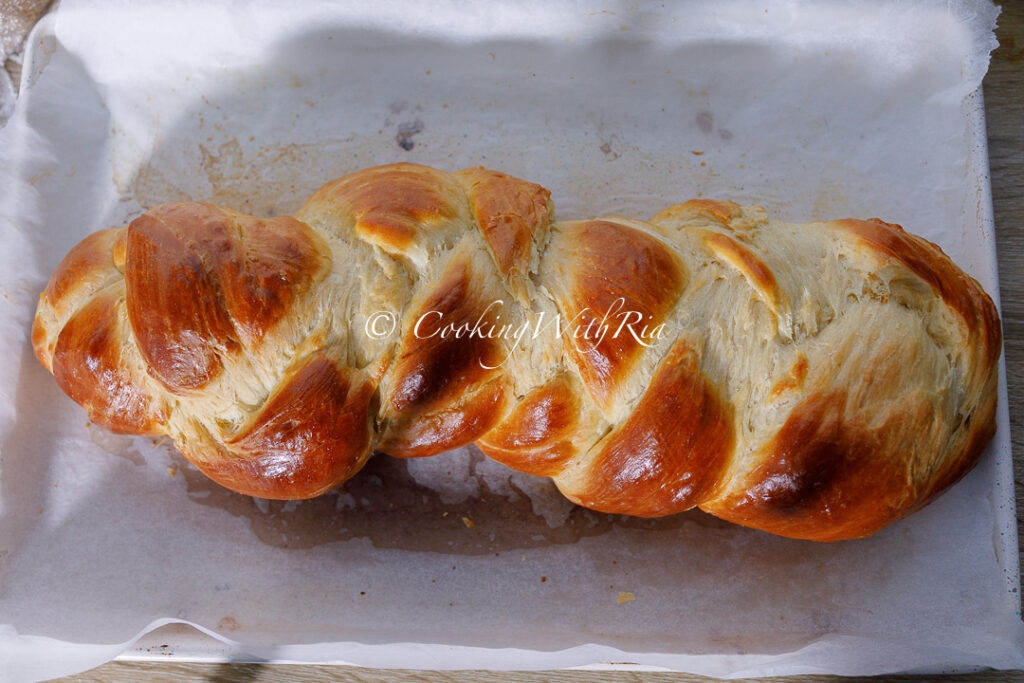
Allow the dough to rise sufficiently. It should double in size during the first rise, and the second rise after shaping is equally important. This contributes to a light and fluffy interior. Place your dough in a warm, but not hot, oven, which helps with the first proofing. Warm the oven to 200F, take off the oven, wait 5 minutes, then place the dough on the door or inside the oven. Remember that if the oven is too hot, it will start the baking process. Also, if the dough does not rise enough in the second proofing, you will have lots of white areas on the bread like the below pic—that’s the areas that expanded–without the egg wash. To overcome this during the baking process, quickly brush with egg wash while in the oven.
Braid with precision:
I am definitely not a pro in this area but this does not prevent me from trying. The goal is to take your time when braiding the dough. Whether you opt for a classic three-strand braid or a more intricate design, precision in braiding ensures an appealing final appearance. If you do not like braided bread, opt for a regular loaf. Press the dough out into a rectangle and roll up to form a log.
Egg Wash for Shine:
Brushing the dough with beaten egg before baking gives the challah a shiny, golden-brown crust. This step also adds a subtle richness to the flavor.
Experiment with Flavors:
Feel free to experiment with flavor variations. Consider increasing sugar or honey or replacing oil with butter. Some add ingredients like orange zest, cinnamon, or raisins for a unique twist on the classic challah.
Control Oven Temperature:
Preheat your oven adequately and monitor the temperature throughout baking. A consistent and controlled temperature ensures even cooking and a beautiful crust. Start checking the bread after 20 minutes or when the aroma of bread sneaks up on you. It should take about 30-40 minutes.
By following these tips, you’ll be well on your way to mastering the art of baking the perfect challah bread. Adjustments can be made based on personal preferences, allowing you to create a challah that suits your taste and style.
Other Holiday Recipes You will Love:
Black Cake – Christmas cake- Caribbean Fruit Cake
Sorrel Drink
Holiday Challah Bread
Equipment
Ingredients
- 4 cups all-purpose flour or as needed
- 1 1/2 cups warm water 110 degrees F/45 degrees C
- 1 tablespoon active dry yeast
- 1 egg plus 2 yolks
- 4 tbs honey or sugar
- 4 tbs melted butter use Oil if keeping Kosher
- 1 1/2 tsp salt
- egg for egg wash
- 1 tsp sesame seeds optional
- Oil for rubbing in bowl and on dough
Instructions
- Measure out the flour and mix in the salt. Set aside.
- In a large mixing bowl or in the bowl of a stand mixer, pour warm water and sprinkle yeast over it. Let it stand until the yeast softens and forms a creamy foam, approximately 5 minutes. If the yeast does not bloom, it is not good. It's time to buy new yeast.
- Beat in the egg and egg yolks, honey or sugar, melted butter or oil. Mix in 3 1/2 cups of flour in increments until the dough comes together, creating a sticky dough.
- Turn the dough out onto a lightly floured surface(or keep in the stand mixer), gradually adding the flour mixture as needed to reduce stickiness. Knead the dough until it becomes smooth and elastic(does not break when stretched), approximately 8-10 minutes.
- Transfer the kneaded dough to a large, lightly-oiled bowl or pot, ensuring it is evenly coated. Cover with a damp towel and let it rise in a warm place until it doubles in volume, around 1 hour. It will take longer in a colder climate.
- Punch down the risen dough to deflate it and turn it onto a lightly floured surface. If it is too soft, knead for a minute or two to tighten the dough.
- Divide the dough into three pieces and roll each into a long rope or log, about 12 inches.
- Pinch the top ends of the three ropes together securely (thick log in the middle) and braid them tightly. Choose to either leave it as a braid or form it into a round braided loaf by connecting and pinching the ends together to seal.
- Place the braided dough on a greased baking tray. Cover it with a towel and let it rise for approximately 1 hour. Meanwhile, preheat the oven to 350 degrees F.
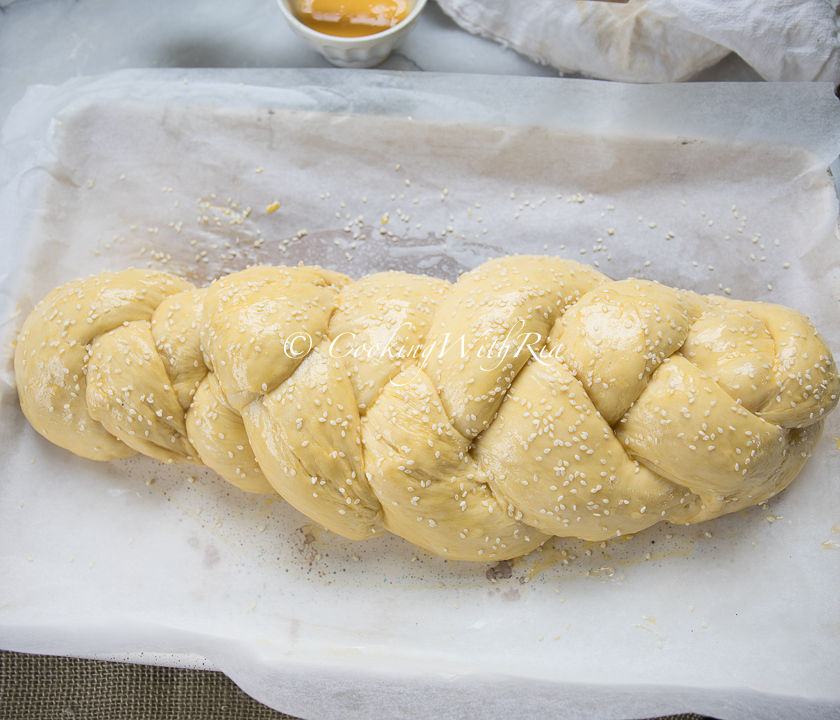
- Once the dough has fully risen, beat the remaining egg, generously brush it over the dough, and optionally sprinkle with sesame seeds.
- Bake in the preheated oven until the bread turns golden brown, usually around 30 minutes.
- Allow the baked bread to cool on a wire rack for at least one hour before slicing

JOIN OUR COMMUNITY
Popular Curry Chicken Recipes
Meet Ria!
A Trinidadian culinary connoisseur sharing recipes from Trinidad and the Caribbean with a modern twist.